.avif)


Signs of Poor Window Installation
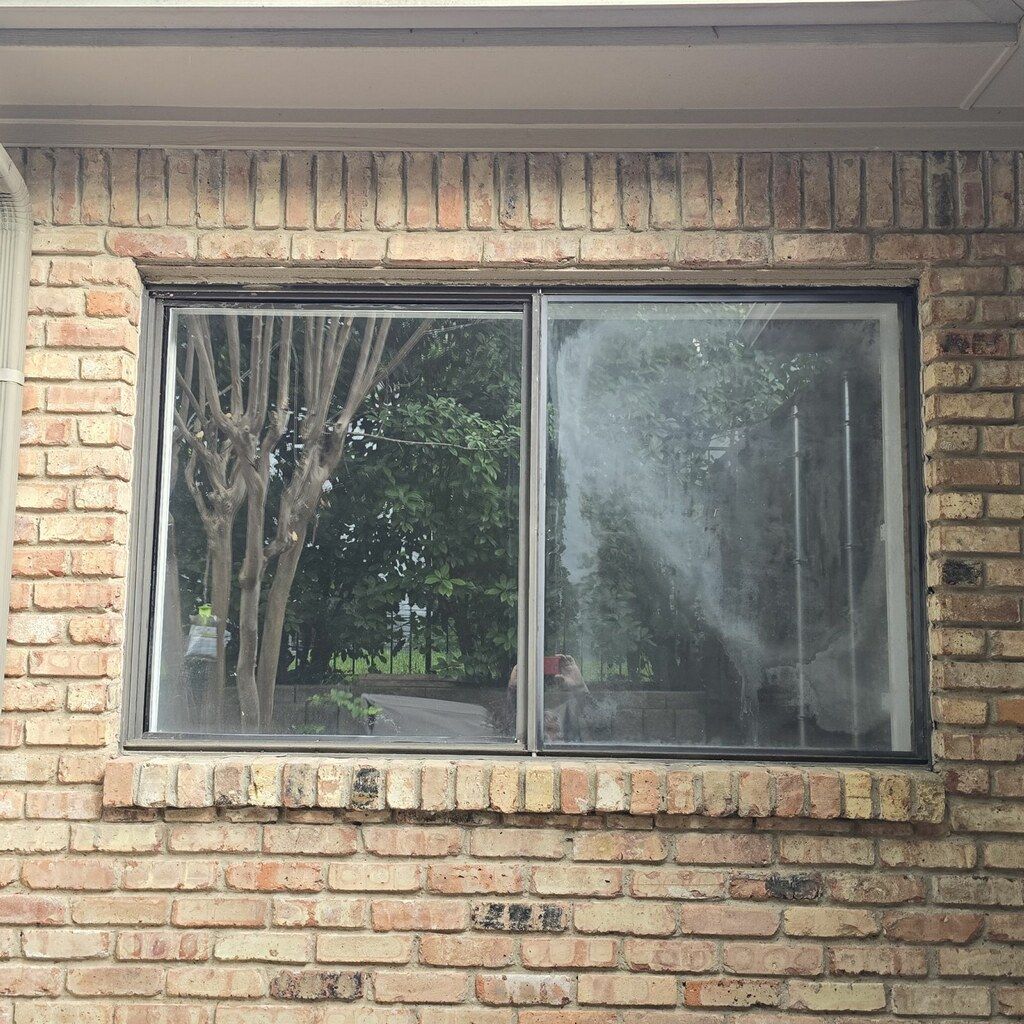

Signs of poor window installation include visible gaps between the frame and the wall, drafts near closed windows, fog or condensation between glass panes, water leaks or stains around the frame, windows that are hard to open or close, crooked or unlevel frames, and sloppy caulking. Even the highest-quality window will fail if it is not installed correctly. According to the U.S. Department of Energy, windows account for 25% to 30% of residential heating and cooling energy use, and improper installation makes that number climb by allowing air and moisture to bypass the window entirely. This article walks through every warning sign, what causes each problem, and what you can do about it.
How to Tell if Windows Were Installed Poorly
You can tell if windows were installed poorly by looking for problems that should not exist on a new or recently replaced window. A properly installed window sits level in the opening, operates smoothly, seals tightly when closed, and shows no gaps, drafts, fog, or moisture. If any of these issues appear right after installation, or within the first year, the installation itself is almost always the cause.
The consequences of poor installation go well beyond appearance. According to Thompson Creek, windows installed incorrectly experience uneven stress, premature seal failure, and accelerated wear on moving parts. A window designed to last 20 to 30 years might fail in just a few years when installation errors compromise its structure. Many window manufacturers will not honor a warranty if the product was improperly installed, which means the homeowner pays for the replacement out of pocket.
In South Florida, where windows must withstand hurricane-force winds, intense UV exposure, and year-round humidity, installation quality is even more critical. A window that is not properly sealed, flashed, and anchored is a weak point in the building envelope during a storm. We see the damage from poor installation regularly, and the cost to correct it is always more than the cost of doing it right the first time.
What Does a Bad Window Installation Look Like?
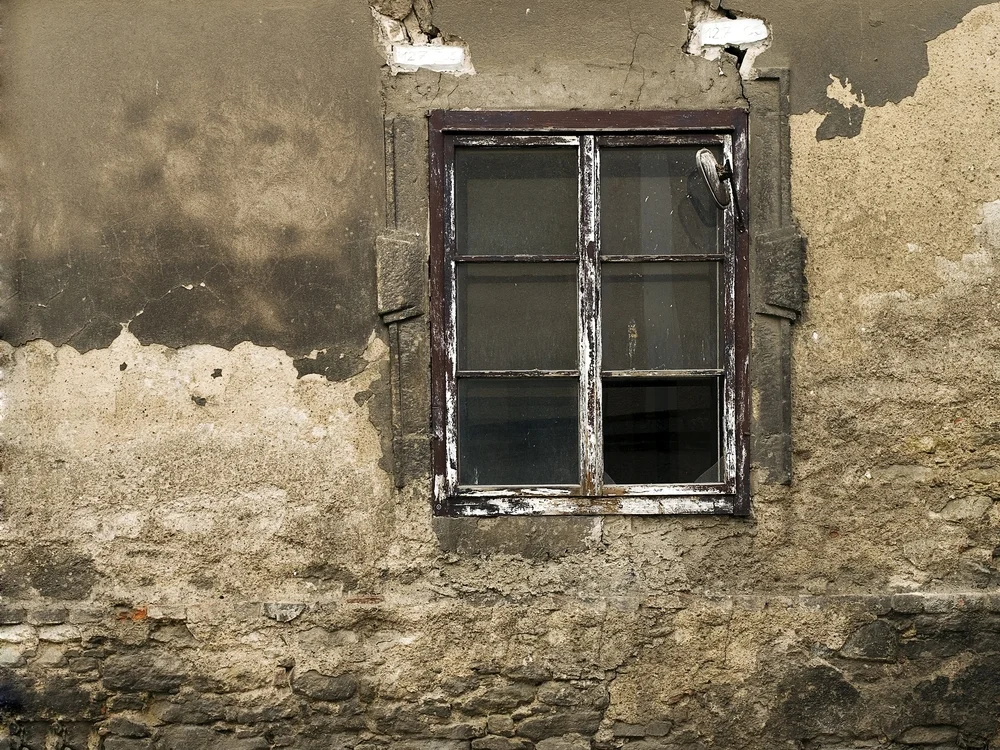
A bad window installation looks like visible gaps between the window frame and the wall, uneven or crooked frames, messy or inconsistent caulk lines, and trim that does not sit flush against the wall. These are the most obvious visual clues, and you do not need to be a professional to spot them.
Gaps Around the Frame
Gaps between the window frame and the windowsill or wall are one of the clearest signs of a bad installation. According to Feldco, gaps indicate that the installer did not take accurate measurements, chose the wrong size window, or did not properly shim and seal the unit in the opening. Even a small gap allows air, water, and insects to enter your home. In a hurricane zone, gaps also compromise the structural integrity of the window under wind pressure.
A properly installed window should have a tight, consistent fit with no visible daylight showing around the edges. If you can see light coming through when you stand inside and look at the frame from different angles, the window was not installed correctly. This type of problem does not improve over time. It gets worse as the building settles and the gap widens.
Messy or Inconsistent Caulking
Caulking should form a smooth, continuous line around the exterior perimeter of the window where the frame meets the wall. If the caulk line is thick in some spots and thin in others, has visible gaps or bubbles, or looks like it was applied in a hurry, the installer cut corners. According to Advanced Windows USA, bad caulking is not just an eyesore. It directly causes air and water leaks that increase energy bills, reduce comfort, and promote mold growth inside your walls.
Good caulking takes patience, a steady hand, and the right product for the climate. Silicone sealant lasts longer in UV-heavy environments. Polyurethane bonds better to wood and concrete. Using the wrong type of caulk, or applying it to a dirty or wet surface, will cause the seal to fail within months. If your caulking looks sloppy, the installation behind it may be just as careless.
Crooked or Unlevel Windows
A window that looks slightly tilted, crooked, or off-center in the opening was not leveled during installation. Leveling is one of the most basic steps in window installation, and skipping it indicates a lack of care or experience. According to Advanced Windows USA, an unlevel window will not operate correctly, will not seal properly, and will look noticeably wrong from both inside and outside the home.
You can check this yourself with a simple bubble level held against the top and sides of the frame. If the bubble is off-center, the window is not level. This is a problem that must be corrected by the installer. Trying to fix an unlevel window after the fact usually means removing and reinstalling the entire unit. Proper window installation includes leveling, plumbing, and squaring the frame before any fasteners are tightened.
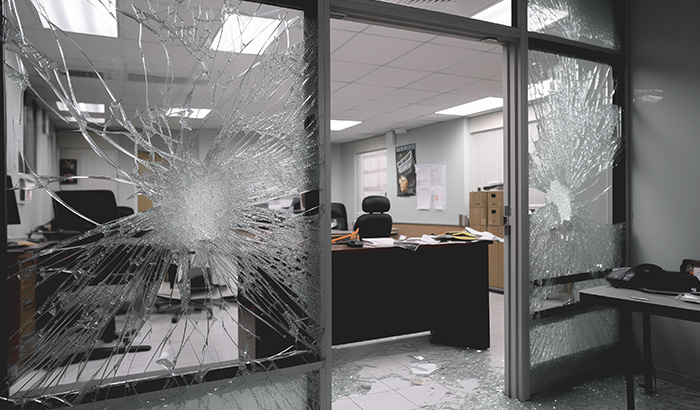
Can Windows Be Installed Incorrectly?
Yes, windows can be installed incorrectly, and it happens more often than most homeowners realize. According to Hall Brothers Lumber, a significant percentage of window and door failures originate from improper installation rather than product defects. Common installation errors include incorrect measurements, missing or poorly applied flashing, inadequate insulation around the frame, overtightened fasteners that warp the frame, and failure to level the unit before securing it.
DIY installations and work done by general contractors without specific window training carry the highest risk of errors. Window installation involves precise measurements at multiple points, proper shimming to support the weight of the glass, correct flashing sequences to direct water away from the opening, and careful sealing to prevent air infiltration. Skipping any one of these steps can cause problems that may not show up for weeks or months, but will eventually lead to drafts, leaks, seal failure, or structural damage.
According to Angi, improper installation risks air leaks, water damage, and voided warranties, which can far outweigh any savings from choosing a cheaper installer. For impact windows in hurricane zones, the stakes are even higher. An incorrectly installed impact window may not perform as rated during a storm, putting the entire building at risk.
What Are Common Window Installation Mistakes?
Common window installation mistakes include inaccurate measurements, improper shimming, missing or incorrectly applied flashing, insufficient insulation around the frame, overtightened screws that distort the frame, failure to level the window, poor caulking, and damaged seals caused by rough handling during installation.
MistakeWhat HappensVisible SignInaccurate measurementsWindow does not fit the opening; gaps formVisible gaps, daylight around edgesImproper shimmingFrame sits unevenly; sash binds or sticksWindow hard to open/close, unlevel frameMissing flashingWater enters behind the frame and into the wallWater stains, mold, peeling paintInsufficient insulationAir passes through wall cavity around the windowDrafts felt around the frame, not the glassOvertightened fastenersFrame warps; seal breaks; sash does not slideDifficult operation, fog between panesPoor caulkingAir and water leak through gaps in the sealantMessy caulk lines, drafts, moistureDamaged seal during handlingInsulating gas escapes; moisture enters between panesFog or condensation between glass panes
Sources: Thompson Creek, Feldco, Advanced Windows USA, Lone Wolf Exteriors, Hall Brothers Lumber.
Each of these mistakes creates a chain reaction. A window that is not level will not seal properly. A window without proper flashing will let water in. Water in the wall leads to mold, rot, and structural damage. The best way to avoid all of these problems is to hire experienced, licensed professionals who specialize in the type of window being installed. For high-rise impact windows, this is especially important because the wind pressures and code requirements are much more demanding than standard residential installations.
How to Check if a Window Is Installed Correctly
To check if a window is installed correctly, start with a visual inspection, then move to functional tests. A properly installed window should pass every one of the following checks.
First, look at the frame from inside and outside. It should sit level, plumb, and square in the opening. Use a bubble level to verify. Next, check the caulking around the exterior perimeter. It should be a smooth, continuous, consistent line with no gaps, bubbles, or blobs. Open and close the window several times. It should move smoothly without sticking, binding, or requiring excessive force. The lock should engage easily and hold the window securely shut.
Then check for drafts. On a windy day, hold your hand or a lit candle near the edges of the closed window. If you feel moving air or the flame flickers, air is getting through. Look for condensation between the glass panes, which indicates a damaged seal. Finally, inspect the area around the window for any signs of moisture, discoloration, or mold, which would suggest water is getting past the flashing or caulking.
If you notice any of these issues within the first year of installation, contact the installer immediately. Most reputable companies offer workmanship warranties that cover installation-related problems. At our company, every project goes through a quality inspection after installation to verify that the window meets our standards and the requirements of the Florida Building Code. Impact glass installations in particular require precise adherence to the manufacturer's specifications and local code standards to maintain their rated performance.
What Are Common Window Framing Mistakes?
Common window framing mistakes include rough openings that are the wrong size, out-of-square framing, missing or improperly installed headers, lack of proper support at the sill, and failure to account for building settlement. These framing errors create problems before the window even arrives on site.
A rough opening that is too large forces the installer to fill oversized gaps with foam and shims, which can lead to uneven pressure on the frame and eventual warping. A rough opening that is too small requires the installer to force the window into place, which stresses the frame and can break the glass seal before the window is ever used. According to Lone Wolf Exteriors, professional measurement involves checking for square corners, measuring at multiple points, and accounting for structural irregularities.
For door fitting and window framing in older buildings, these challenges are even more common because the original openings may have shifted over decades of use. An experienced installer knows how to evaluate the existing framing and make corrections before setting the new window in place.
What Is the Tolerance for Window Installation?
The tolerance for window installation is typically 1/4 inch to 3/8 inch of clearance between the window frame and the rough opening on each side. This gap is filled with low-expansion foam insulation and then sealed with caulk. According to industry standards and building codes, the air leakage rate for an installed window must not exceed 0.3 cubic feet per minute per square foot (cfm/ft2), as specified by the National Fenestration Rating Council (NFRC).
Going beyond these tolerances in either direction creates problems. Too much gap means the insulation and sealant have to bridge a larger space, which increases the risk of settling, cracking, and air leakage over time. Too little gap means the window may be forced into place, creating stress on the frame that can crack the glass, break the seal, or prevent the sash from operating smoothly.
In hurricane zones, the tolerances are even tighter because the window must be anchored to withstand specific wind pressures. Impact-rated windows have manufacturer-specific installation instructions that dictate the exact fastener type, spacing, and embedment depth. Deviating from those instructions can void the product approval and the warranty. The same precision applies to French doors and other large openings where wind loads are highest.
We follow every manufacturer specification on every installation, whether it is a single entry door or a full building envelope replacement.
Is Window Installation Difficult?
Yes, window installation is difficult, especially for impact-rated and hurricane-code windows. It requires precise measurement, proper structural preparation, correct flashing and sealing sequences, careful handling of heavy glass units, and strict compliance with building codes. According to Tom Silva, general contractor for This Old House, "A new window is only as good as its installation. You can't just take the window out of the box and slap it into the opening."
For standard replacement windows in a well-maintained frame, an experienced DIYer may be able to handle a simple pocket installation. But for full-frame replacements, new construction installations, or any installation involving impact-rated products, professional installation is the clear choice. The risk of voiding the warranty, failing a building inspection, or creating a weak point in your storm protection is too high to justify the savings from doing it yourself.
We install impact windows and doors across residential, commercial, and high-rise properties. Every installation is handled by trained crews who follow the manufacturer's guidelines and local code requirements down to the last fastener.
How Poor Installation Affects Energy Bills and Comfort
Poor installation affects energy bills and comfort by creating hidden air paths that let conditioned air escape and outside air enter. Even if the window glass itself is high-performance, air that bypasses the window through gaps in the insulation, flashing, or caulking negates the benefit of the glass.
According to Thompson Creek, air leaks around improperly installed windows can account for significant energy loss, directly impacting utility costs month after month. The U.S. Department of Energy notes that air leakage accounts for 25% to 40% of the energy used for heating and cooling in a typical home. In hot climates like South Florida, where air conditioning runs six to eight months a year, those leaks translate directly into higher electric bills.
Poor installation also creates comfort problems. Drafts make certain rooms feel colder or hotter than others, regardless of thermostat settings. Moisture intrusion from improper flashing can lead to mold growth inside the walls, which affects indoor air quality. And windows that do not operate correctly become a safety hazard, especially during an emergency when you need a quick exit. Investing in professional installation protects your comfort, your health, and your wallet.
What to Do if You Discover Poor Installation
If you discover signs of poor installation, document everything with photos and detailed notes. Contact the installation company immediately to report the problems and request a correction. Review the warranty and installation contract to understand what is covered. If the installer is unresponsive or disputes the issue, hire an independent inspector to assess the work and provide a written report.
Most reputable window companies stand behind their workmanship and will send a crew back to correct any installation errors. If the original installer cannot or will not fix the problem, a second company can usually correct the work, though the cost may need to be recovered through a warranty claim or legal action against the original contractor.
For commercial properties with many windows, a full post-installation audit using thermal imaging can identify every problem point efficiently. Addressing all issues at once is more cost-effective than dealing with them one at a time as they show up. The sooner poor installation is corrected, the less damage it causes to the surrounding wall structure, insulation, and finishes.
Frequently Asked Questions
How to Check if a Window Installer Is Installed Correctly?
To check if a window installer did the job correctly, verify that the window is level and plumb, operates smoothly, locks securely, shows no gaps or daylight around the frame, has clean and consistent caulking, and shows no signs of moisture or fog between the panes. You can also request a copy of the installation inspection report if one was required by your local building department.
How to Check Window Installation for Errors?
To check window installation for errors, perform a visual inspection of the frame, caulking, and trim from both inside and outside. Then do a draft test by holding your hand or a candle near the edges of the closed window. Check for condensation between panes. Open and close the window to test operation. If you find any issues, contact the installer while the workmanship warranty is still in effect.
Are 20-Year-Old Windows Still Good?
Twenty-year-old windows may still function, but they are likely at or past the point where seals, weatherstripping, and frames begin to fail. Most window seals last 10 to 20 years, so at the 20-year mark, reduced insulating performance and increased air leakage are common. If you notice drafts, fog, or rising energy bills, a professional inspection can determine whether repair or replacement is the better option.
What Is the Cheapest Time of Year to Buy Windows?
The cheapest time of year to buy windows is typically late fall through early spring, when demand for installations is lower. In South Florida, the months between October and March offer more availability and potentially shorter lead times because hurricane season has ended. Scheduling sliding door or window replacement during the off-season can also give you more flexibility with scheduling.
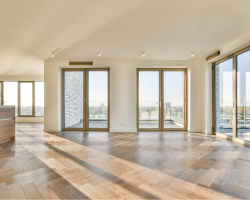
What Should a Proper Window Installation Include?
A proper window installation should include accurate measurements, correct sizing, proper shimming and leveling, installation of flashing and a water-resistant barrier, low-expansion foam insulation around the frame, high-quality exterior caulking, smooth and secure hardware operation, and a final inspection to verify code compliance. For impact-rated products, the installation must also follow the manufacturer's specific anchoring and fastener requirements.
Can Poor Installation Void My Window Warranty?
Yes, poor installation can void your window warranty. Most window manufacturers require that their products be installed by certified or licensed professionals following the manufacturer's specific guidelines. If the warranty claim reveals that the window was improperly installed, the manufacturer may deny coverage, leaving the homeowner responsible for the full cost of repair or replacement.
How Long Should a Properly Installed Window Last?
A properly installed window should last 20 to 30 years or more, depending on the quality of the product and the climate. According to multiple industry sources, modern windows with dual-seal technology, low-E coatings, and quality frames can last 25 to 50 years with minimal maintenance. Fiberglass doors and frames tend to last the longest because they resist warping, corrosion, and UV degradation better than wood or vinyl.
What It All Comes Down To
The quality of your window installation determines how well your windows perform, how long they last, and how much they save you in energy costs. Even the best window in the world will fail if it is not installed correctly. Gaps, drafts, fog, leaks, crooked frames, and sticky operation are all signs that something went wrong during installation, and ignoring them only makes the problem worse over time.
If you need window or door installation done right the first time, ASP Windows & Doors has over 20 years of experience delivering professional, code-compliant installations across South Florida. Call us at (888) 782-8342 for a free estimate.
Now Accepting Appointments
Proudly serving homeowners and businesses across South Florida and Southwest Florida. Book your visit and let our experts help protect and upgrade your space.
.avif)
.avif)
.avif)
%201.avif)
Insights & Resources
Stay informed with expert tips on impact windows, hurricane protection, and South Florida building standards.


%201.webp)
%201%20(1).webp)
%201.svg)
%201%20(1)%20(1).webp)
.png%20(1).webp)
.avif)
.avif)


.avif)
