.avif)


How Do You Prepare a New Window for Installation
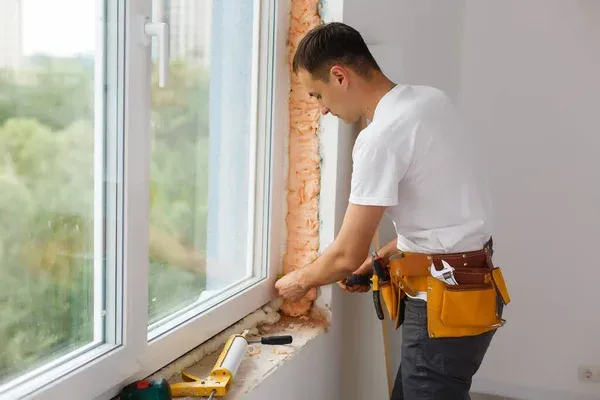

Preparing a new window for installation runs on two tracks at once. The crew prepares the rough opening by measuring it, squaring it, clearing it, building a sloped sill pan, dry-fitting the unit, and sealing the perimeter while leaving a drainage path open at the bottom. The homeowner prepares the house by clearing the work areas, removing window coverings, and arranging access. The first track decides whether the window performs for twenty years or leaks in five, and the second decides whether installation day runs smoothly. This article covers both, explains why the standard flanged-window method most guides describe does not apply to a concrete block wall, and ends with a checklist for verifying that your own installation was prepared correctly.
Key Takeaways
- Opening preparation and household preparation are separate jobs on separate tracks, and only one of them belongs to the homeowner.
- A rough opening is sized roughly 1 to 2 inches wider and taller than the window unit, leaving room to shim the frame plumb, level, and square.
- The sill is sloped on the order of 1/8 to 1/4 inch toward the exterior, and pan flashing wraps 4 to 6 inches up the side jambs.
- Builder Matt Risinger estimates more than 90 percent of windows installed in American homes sit over no sill pan at all, which is the most common preparation failure in the trade.
- The bottom flange stays untaped and uncaulked on purpose, because the assembly is designed to drain rather than to be sealed watertight.
- In the High Velocity Hurricane Zone the fastener type, size, embedment, and spacing come from the product approval document, not from the installer's judgment.
- Most South Florida homes are stucco over concrete block, where there is no house wrap to slit and no stud to nail into, so the standard flanged method in national guides does not apply.
- Homeowners should clear roughly two to three feet of floor space in front of each opening and remove every blind, shade, and curtain before the crew arrives.
How Do You Prepare a New Window for Installation?
You prepare a new window for installation by preparing the opening it goes into, not the window itself. The unit arrives from the factory finished and ready. Everything that determines how it performs happens in the hole it sits in.
That hole has to be the right size, square in both diagonals, level across the sill, plumb at the jambs, and clean. It also has to be waterproofed in a way that assumes water will eventually get past the exterior finish, because over a few decades it usually does.
Household preparation is the other track, and it is the one most homeowners are actually searching for. Clearing work areas, taking down window coverings, and arranging access all happen on the homeowner's side, and they determine whether installation day runs on schedule. Both tracks matter, and the opening track comes first because everything else depends on it.
How Do You Prepare the Rough Opening for a New Window?
You prepare the rough opening by verifying its dimensions, clearing out old material, and confirming that it is level, plumb, and square before any window goes near it. Verification comes first because every later step assumes the opening is true, and an opening that is out of square cannot be corrected once the unit is anchored.
Clearing comes next. Old insulation, loose mortar, fasteners from the previous unit, stucco dust, and debris all come out, usually with a shop vacuum and a scraper, because a sill pan bonded over debris does not bond at all.
Checking true is the last step before anything is built. The sill is checked flat and horizontal, the jambs are checked straight up and down, and the diagonals are measured corner to corner to confirm square. Diagonals that differ by more than a small fraction mean the opening needs correction rather than compensation, since forcing a square window into an out-of-square hole binds the sash and stresses the glass unit.
How Big of a Gap Around Replacement Windows?
The gap around a replacement window runs roughly 1/2 inch per side, with the rough opening sized about 1 to 2 inches wider and taller than the unit overall. That clearance exists so the frame can be shimmed into true position independent of whatever the wall is doing.
Too little clearance leaves no room to shim and forces the installer to set the window to the opening rather than to level. Too much clearance leaves a gap that insulation and sealant have to span, which weakens both the air seal and the structural attachment. The clearance also has to stay clear, since the gap at the sill is part of the drainage path rather than a void to be filled solid.
How Do You Measure a Window for Replacement?
You measure a window for replacement by taking three heights and three widths and ordering to the smallest of each. Three measurements per dimension catch the out-of-square conditions that a single measurement hides.
Height is measured at the left, the middle, and the right. Width is measured at the top, the middle, and the bottom. The smallest height and the smallest width become the order dimensions, because a unit sized to the largest measurement will not fit through the tightest point of the opening. Measurements are taken inside the existing frame rather than between the stops, and a unit is never ordered from a single reading.
What Is a Sill Pan and Why Does Every Window Need One?
A sill pan is a waterproof tray built into the bottom of the rough opening that catches any water reaching the sill and drains it back outside. Catching and draining is the entire function, and it is built on the assumption that water will eventually get behind the exterior finish.
That assumption is what separates a durable installation from a fragile one. Builder Matt Risinger, writing for Fine Homebuilding, estimates that more than 90 percent of windows installed in American homes have no sill pan beneath them, which makes this the most commonly skipped preparation step in the entire trade. The windows that leak are rarely the ones that were sealed badly. They are the ones with nowhere for water to go once it arrives.
Construction follows a consistent pattern. The sill is sloped slightly toward the exterior, on the order of 1/8 to 1/4 inch across its depth, so gravity moves water outward. A self-adhered flashing membrane or a formed pan is laid across the sloped sill and wrapped 4 to 6 inches up each side jamb, forming a tray with raised edges. Shims, typically 1/4 inch or 3/8 inch, are set on top of the pan where they carry the window's weight without blocking the drainage path.
Blocking that path is the failure mode worth naming. A pan that drains nowhere is a bathtub, and a window sitting in a bathtub rots the framing beneath it regardless of how well the glass performs. Correct glass glazing work follows the same logic at a smaller scale, which is why drainage shows up at every level of a well-built window assembly.
How Is a New Window Anchored and Sealed?
A new window is anchored by shimming it true and fastening it through the frame or flange on a specified schedule, then sealed on the top and sides while the bottom stays open to drain. Shimming comes before fastening, always, because a window fastened before it is true stays untrue permanently.
The sequence runs dry-fit, shim, anchor, seal. The unit is lifted into the opening with no sealant applied, to confirm it sits flush and square against the opening and that the clearance is even all the way around. It comes back out, sealant goes on the head and jambs, and the unit goes back in and is shimmed at each fastening point before anything is driven.
Sealing then follows the drainage logic from the sill pan. The head and jambs get a continuous bead, commonly around 3/8 inch, and the bottom edge is deliberately left open so any water that gets in can get back out.
What Holds Replacement Windows in Place?
Replacement windows are held in place by mechanical fasteners driven through the frame or the nailing flange into solid structure, with shims transferring the load. Shims carry the weight at each fastening point, which keeps the frame from distorting as the fasteners tighten.
Sealant holds nothing structurally. Caulk and foam create air and water seals, and a window relying on adhesive to stay in its opening is an installation failure waiting for the first strong wind.
Do Replacement Windows Come With a Nailing Flange?
Replacement windows come with a nailing flange only when they are designed for new construction or full-frame installation. Full-frame units carry an integral flange, a thin perimeter fin that extends past the frame and gets fastened to the wall sheathing before the exterior finish goes over it.
Insert or pocket replacement units carry no flange at all. Those are designed to slide into an existing frame and fasten through the jambs from inside the opening, which is what makes them usable without disturbing exterior stucco or siding. Which type a project needs depends on whether the existing frame is sound, and that determination belongs in the assessment before anything is ordered.
Should You Nail the Top Flange of a Window?
The top flange of a window is fastened, and the fastener schedule comes from the manufacturer's installation instructions rather than from habit. Instructions specify fastener type, length, and spacing for each assembly, and they exist because the manufacturer tested the unit with those fasteners.
Head flashing goes over the top flange afterward, lapping down over it so water running down the wall sheds across the flashing rather than behind it. The lap direction matters more than the fastener count, since flashing installed in the wrong order channels water directly into the opening it was meant to protect.
Do You Tape the Bottom Flange of a Window?
You do not tape the bottom flange of a window, and taping it is one of the most damaging mistakes in window installation. Taping it closes the only exit water has once it gets into the assembly.
The side flashing laps over the jamb flanges, the head flashing laps over the top, and the bottom is left open on purpose so the sill pan can discharge to the exterior. Sealing all four sides converts a drainable assembly into a sealed cavity that collects water and holds it against the framing, which is the condition that rots sills.
Do You Caulk a Window Flange?
You caulk behind the top and side flanges before setting the window, and you leave the bottom flange free of sealant. Sealant behind the head and jamb flanges blocks air and water at the perimeter where no drainage is needed.
The bottom follows the same rule as the tape. A continuous bead across the sill traps whatever reaches the pan, so that edge stays open while the three upper edges are sealed. Weep holes in the frame or sill adapter follow the same principle at the unit level, and they stay clear of caulk during exterior trim work.
Can You Cut the Nailing Flange Off a Window?
You cannot cut the nailing flange off a window without voiding its approval and its warranty. The flange is a tested structural component on a flanged unit, not trim, and the assembly passed its wind and impact testing with that flange fastened as specified.
Cutting it removes the attachment method the test report assumed, which means the installation no longer matches any approved configuration. Installers who need a flangeless unit specify a flangeless unit. Where an existing frame has to stay in place, an insert replacement designed for that condition is the correct product rather than a modified new-construction window.
Why Impact Window Preparation Is Different in Florida
Impact window preparation differs in Florida because most homes here are built from concrete block, and the standard flanged method assumes wood framing that is not there. Wood framing is what national installation guides describe: slit the house wrap, fold the flaps, nail the flange to the sheathing. A stucco-over-block wall has no house wrap to slit and no stud to nail into.
Block construction calls for a different approach entirely. The opening is a masonry buck or a precast surround, the window is anchored with masonry fasteners set to a specified embedment depth, and the waterproofing relies on sealant joints and flashing details suited to a cementitious substrate rather than to a membrane-wrapped sheathing. The crews installing impact windows in this market work this way on the majority of jobs.
Fastener selection is where the difference becomes a legal matter rather than a technical preference. Products installed in the High Velocity Hurricane Zone carry Florida Product Approval or a Miami-Dade Notice of Acceptance, and that document specifies the fastener type, diameter, embedment, and spacing for each anchoring condition. Deviating from the schedule means the installed assembly no longer matches the approved one, which is why nobody on a compliant job decides fastener size on site.
Weight is the other practical difference. A laminated impact glass assembly is substantially heavier than a standard insulated unit of the same size, which changes how units are lifted, how many hands an opening takes, and how shims are placed to carry the load without deflecting the frame.
Permitting belongs in the preparation phase too, even though no national guide treats it that way. The permit application goes in with the product approval documentation and the code calculation before anything is removed, and a final inspection closes the job afterward. Miami-Dade and Broward counties sit inside the High Velocity Hurricane Zone, where both steps are enforced closely.
We work inside those requirements on every job, including as a state-licensed, program approved contractor for state wind-hardening work, so the documentation side of preparation is as routine for our crews as the shimming.
Can I Install a Replacement Window Myself?
You can install a replacement window yourself in some parts of the country, and you cannot do it compliantly in a wind-borne debris region like South Florida. Compliance is the obstacle rather than skill. The work requires a permit, the permit requires approved product documentation, and the inspection checks an anchoring schedule that comes from that documentation.
Three consequences follow a self-installed window here, and they compound. The permit cannot be closed, which surfaces during title and inspection review at resale. The manufacturer warranty on most impact assemblies is conditioned on installation per the published instructions, so a non-conforming install can void it. And the wind mitigation insurance credit depends on documented opening protection, which an uninspected installation cannot produce.
None of that makes homeowners incapable. It makes the paperwork, not the carpentry, the reason professional impact window installation is the only practical route in this market.
Warranty terms are worth reading closely before any decision, since glass coverage and frame coverage often run different durations and labor may or may not be included, which we walk through in our piece on the window warranty question.
How Do You Prepare Your Home for Window Installation?
You prepare your home for window installation by clearing the work areas, removing everything attached to the windows, and arranging access for the crew. Clear access is what keeps a multi-opening day on schedule, since a crew that has to move furniture is a crew not installing windows.
Work through this sequence in the days before installation:
- Remove every window covering. Blinds, shades, shutters, curtains, rods, and all mounting hardware come off each opening in the scope.
- Clear two to three feet of floor in front of each window. Crews need roughly two feet for drop cloths and tools, and moving valuables three feet back gives a safety margin.
- Take down wall art and mirrors near the openings. Installation transmits vibration through the wall, and anything hanging within a few feet can shift.
- Cover or relocate electronics and loose papers. Wind moves through the house while an opening is empty, so anything light or sensitive gets secured.
- Clear a path from the entry to every work area, and leave the driveway or a staging area open for the crew's workstation.
- Trim landscaping and move exterior items. Overgrown shrubs below a window block access, and patio furniture, hoses, and planters need to be out of the way.
- Secure pets in a closed room. Exterior doors and gates stand open during the work and cannot always be closed behind the crew.
- Notify your alarm company if sensors are mounted on the windows being replaced, so the system can be taken offline and reconnected afterward.
- Confirm the permit is issued and that the product approval documentation matches the units arriving.
Older homes carry one more consideration. Houses built before 1978 may contain lead paint around window trim, which requires certified handling practices rather than ordinary demolition.
What to Do Before Installing New Windows
Before installing new windows, confirm the measurements, the product specification, and the permit, then prepare the rooms. Confirming specification before delivery prevents the single most expensive delay in the process, which is a unit that arrives in the wrong size or the wrong glass package.
Check that the order sheet lists each opening with its style, frame material, glass package, and approval number. Expect some dust and noise regardless of how carefully the crew works, and expect that older plaster or stucco around an opening may come loose when the existing unit is removed, which is normal rather than damage.
Do Window Installers Need to Come Inside?
Window installers do need to come inside for nearly every replacement, even when most of the work happens on the exterior. Interior access is required to remove the old unit cleanly, shim and fasten the new frame from inside the opening, apply the interior perimeter seal, and finish the interior trim.
Interior work also means someone should be reachable during the day. Crews work opening by opening and often have questions about trim finish, hardware orientation, or which rooms to tackle in what order, and an available homeowner keeps those decisions from stalling the schedule.
Do You Install Replacement Windows From the Inside or Outside?
Replacement windows are installed from the outside on most ground-floor openings and from the inside when exterior access is restricted. Restricted access covers upper floors without staging, openings above hardscape or dense landscaping, and high-rise units with no exterior working surface.
Exterior installation generally makes flashing and perimeter sealing more straightforward, since the installer works on the same side as the water. Interior installation requires managing the weather barrier and the perimeter seal from inside the opening, which calls for more experience and tighter sequencing but produces the same finished result when done properly.
What Happens on Installation Day?
On installation day the crew stages the work area, removes and replaces openings in sequence, and never leaves an opening uncovered overnight. Sequencing by stage rather than by individual window is standard practice, with the same operation carried out across several openings before the crew moves to the next step.
How long each opening takes depends almost entirely on which replacement method the project uses.
Those timings come from manufacturer guidance published by Pella, which also puts a two-person crew at roughly eight to ten insert openings in a single day. Large or heavy assemblies, second-story openings, and impact doors all run longer than the table suggests.
Crews typically start between eight and nine in the morning and stay until the day's openings are closed in. Nothing is removed that cannot be reinstalled the same day, so a multi-day project may leave a window incomplete at the end of a day but never leaves the house open. Our own crews work this way across all residential services, and homeowners who want to see a complete assembly before the trucks arrive are welcome at our Doral showroom.
How Do You Know the Preparation Was Done Right?
You know the preparation was done right by checking the operation, the seal pattern, the drainage path, and the paperwork once the crew has finished. Those four checks take a few minutes per opening and catch nearly every preparation failure while it is still correctable.
Walk each opening against this list:
- The sash operates smoothly through its full travel and locks without being pushed or lifted. Binding points to a frame that was fastened out of square.
- The reveal is even all the way around. Measure the gap between sash and frame at several points; a gap that tapers means the frame is out of plumb.
- The head and jambs are sealed and the bottom edge is not. A continuous bead across the sill exterior is a defect, not a finishing touch.
- Weep holes are open and free of caulk or paint. Check the bottom of the frame or sill adapter and confirm nothing is blocking them.
- Interior and exterior trim sits tight to the wall with no gaps at the miters and no daylight visible at the perimeter.
- No air movement at the frame edge with the window closed and locked, checked on a breezy day with the back of your hand.
- The permit is closed and the final inspection passed, with documentation you can produce at resale or at insurance renewal.
- You have the product approval numbers and the warranty paperwork for each unit, which is what our warranties are written against.
Anything that fails those checks is far easier to fix in the first week than in the first storm. Properly prepared hurricane impact windows should pass every item on that list on the day the crew leaves.
After that, the maintenance routine takes over. Keeping weep holes clear, re-caulking exterior joints when the bead cracks, and rinsing frames and hardware on coastal elevations protect the preparation work for decades, and we lay out the full seasonal routine in our piece on window maintenance.
Frequently Asked Questions
Do You Need a Permit to Install a Replacement Window?
You need a permit to install a replacement window in nearly every jurisdiction, because window replacement alters the building envelope and counts as a regulated structural alteration. The permit application includes product approval documentation, and a final inspection closes the job. A licensed contractor pulls the permit as part of the project rather than leaving it to the homeowner.
Will My House Be Left Open Overnight During Window Replacement?
Your house will not be left open overnight during window replacement, because crews only remove an opening they can close the same day. On a multi-day project a window may be left incomplete in terms of trim or final sealing, but the opening itself is weathertight and secure before the crew leaves. Confirm this expectation with your contractor before work begins.
Do I Need to Be Home During Window Installation?
You should plan to be reachable during window installation, though you do not need to watch every opening. Crews commonly have questions about trim finish, hardware orientation, or room sequencing, and a quick answer keeps the schedule moving. Being present at the end of the job matters most, since that is when the crew leader walks the completed work with you.
How Long Does It Take to Install One Window?
Installing one window takes about one hour for an insert replacement and about four to six hours for a full-frame replacement. Full-frame work takes longer because the frame, sill, and trim come out, the rough opening is inspected and repaired, and new flashing and a sill pan are installed before the unit goes in. Large or heavy assemblies and elevated openings extend both figures.
Does the Rough Opening Need to Be Level and Square?
The rough opening needs to be level, plumb, and square before a window is set into it. A sill that is out of level causes uneven load across the frame, and an opening out of square forces the frame into a shape the sash cannot seal against. Installers correct the opening rather than compensating with extra shims, because compensation distorts the frame.
Should New Windows Be Sealed With Caulk or Spray Foam?
New windows are sealed with both, in different places and for different purposes. Low-expansion foam rated for windows fills the gap between frame and rough opening to create an air seal without bowing the frame, while exterior sealant closes the joint between the frame and the wall finish. Neither goes across the bottom drainage path, and standard high-expansion foam is never used because it can distort the frame.
The Bottom Line
Preparing a new window for installation is almost entirely about preparing the opening. The hole gets measured three ways in each direction, cleared down to sound material, checked level and plumb and square, fitted with a sloped sill pan that drains to the outside, and sized about 1 to 2 inches larger than the unit so the frame can be shimmed true. The window is dry-fit before any sealant touches it, sealed at the head and jambs, and deliberately left open at the bottom so water has somewhere to go. Skip the sill pan, tape the bottom flange, or fasten before shimming, and the best window on the market will still fail early.
In South Florida one more layer sits on top of all of it. Most homes here are concrete block rather than wood frame, so the flanged method national guides describe does not apply, and the fastener schedule comes from the product approval document rather than from the installer. That combination is why the preparation work and the paperwork are really the same job here. If you want someone to measure your openings, confirm what the walls behind them actually are, and handle the permit and inspection end of it, the team at ASP Windows & Doors is glad to walk the house with you, and a free estimate comes with no obligation attached.
Now Accepting Appointments
Proudly serving homeowners and businesses across South Florida and Southwest Florida. Book your visit and let our experts help protect and upgrade your space.
.avif)
.avif)
.avif)
%201.avif)
Insights & Resources
Stay informed with expert tips on impact windows, hurricane protection, and South Florida building standards.


%201.webp)
%201%20(1).webp)


%201.svg)
%201%20(1)%20(1).webp)
.png%20(1).webp)
.png.webp)
.avif)
.avif)


.avif)


.png)
.png)